When to Use Multi-Agent
Use multiple agents when:- Different topics require different knowledge sources
- Response styles should vary by domain (e.g., technical vs. billing)
ℹ️ NOTE: For most use cases, a single well-configured agent is sufficient. Only add complexity when it provides clear value.
Step 1: Create Specialist Agents
Create one agent per domain. Each should have:- Focused knowledge sources — only the content relevant to that domain
- Tailored prompt — instructions specific to the domain’s tone, rules, and escalation
- Appropriate tools — only the tools that domain needs
Create each agent following the standard process in AI Studio > Agents > Create Agent.
See Agents for configuration details.
Step 2: Create the Router Agent
The router agent receives all user messages and automatically delegates to the right specialist using AI-powered intent detection.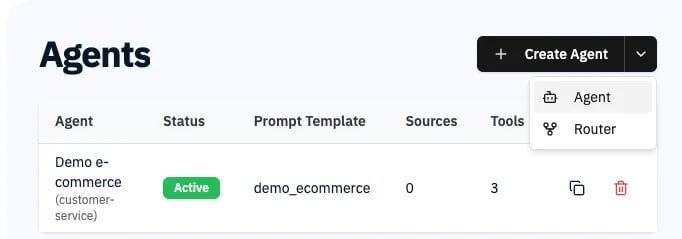
Create a router from the Agents page dropdown
- Navigate to AI Studio > Agents
- Click the dropdown arrow next to Create Agent and select Router
- Name it something like
Main RouterorSupport Router - In the General tab, select the specialist agents the router can delegate to
- Optionally set a Default Fallback Agent (appears below the agent list when 2+ agents are selected)
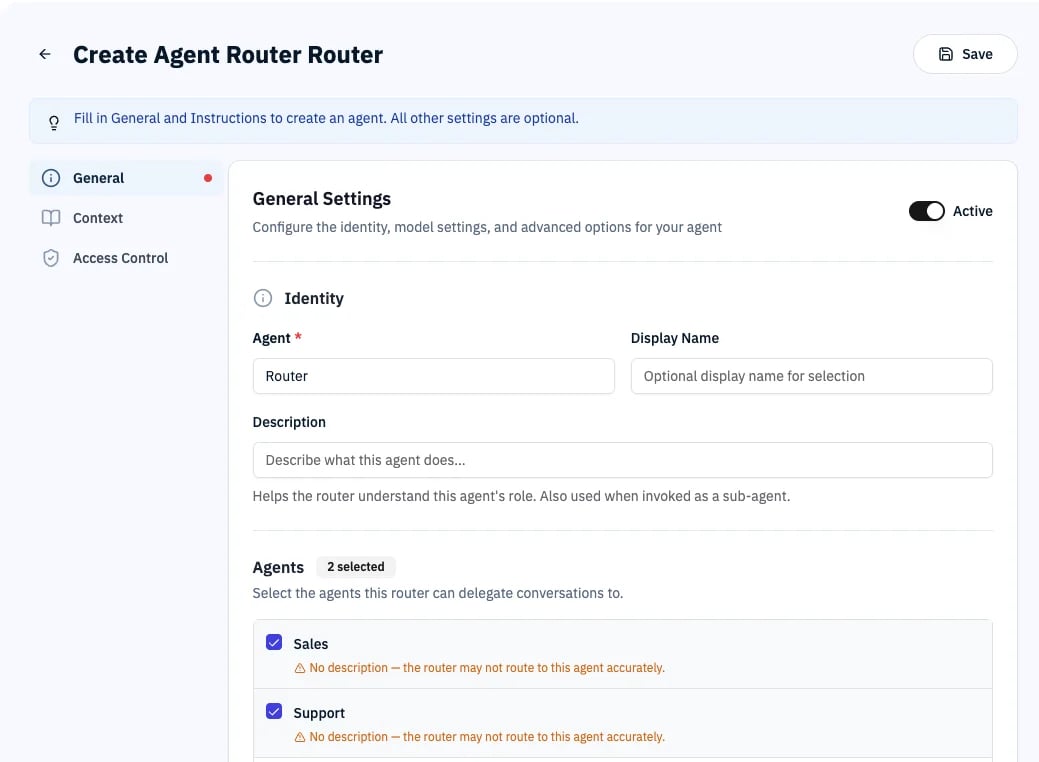
Router builder — select agents to delegate to and add descriptions so the router knows how to route
Step 3: Write Agent Descriptions
The router selects the right specialist based on agent descriptions. Write descriptions that clearly explain what each agent handles:💡 TIP: Be specific about what each agent handles. Vague descriptions like “general support” lead to inconsistent routing.Optionally, add custom routing instructions in the router’s prompt template for edge cases:
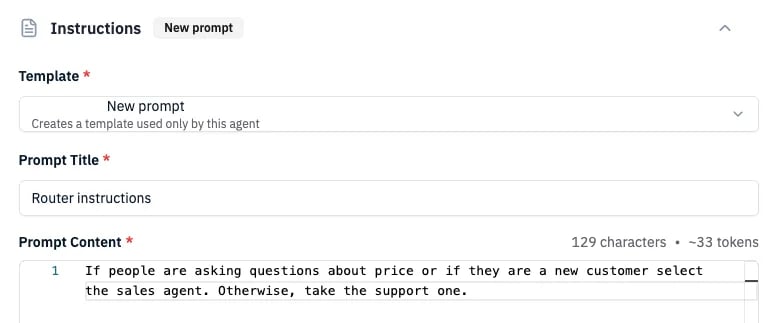
Prompt template with custom routing instructions that guide the router's decision
Step 4: Configure Permissions
The router respects agent permissions. If a user doesn’t have access to a specialist agent, that agent is excluded from the routing options. This means different users may be routed to different agents for the same message, depending on their permissions. Make sure users have the right permissions to access the specialist agents. See Agent Permissions.Step 5: Test Routing
Use simulation testing to validate routing accuracy:- Navigate to AI Studio > Agent Lab
- Create test cases covering each routing path:
- Run the simulation and verify correct routing
- Check that specialist agents provide accurate responses
How It Works
Routing Logic
- Single agent available: The router skips the LLM call and delegates directly — no latency overhead
- Multiple agents available: The router calls the LLM with the list of agents and their descriptions, then delegates to the best match
- No clear match: Falls back to the Default Fallback Agent if configured, otherwise the first available non-router agent
- Router-to-router loop prevention: If the router accidentally selects another router, it automatically falls back to a non-router agent
Default Fallback Agent
In the General tab (below the agent list), optionally set a Default Fallback Agent. This agent is used when the router cannot confidently determine the best match. If no fallback is configured, the router uses the first available non-router agent.Knowledge Sources for Routing Context
If you assign knowledge sources to the router, retrieved documents are included as context during the routing decision. This is useful when routing depends on domain-specific knowledge that the LLM wouldn’t have otherwise. Example use case: A router that needs to distinguish between product lines based on technical terminology found in your documentation.Clarification with Suggested Actions
When Suggested Actions is enabled on a router, the router can choose to ask the user a clarifying question instead of routing immediately. This happens when the user’s intent is ambiguous and could match multiple agents. Instead of guessing, the router presents clickable suggested actions that help the user clarify their intent. Once the user responds, the router routes to the correct specialist.Best Practices
- Write clear agent descriptions — the router’s accuracy depends entirely on how well each agent’s role is described
- Use a fast LLM for routing — the routing step is a simple classification task; an expensive model adds cost without improving accuracy
- Set a default fallback — ensures the user always gets a response, even for unexpected intents
- Keep the agent list focused — too many similar agents make routing harder; consolidate agents with overlapping responsibilities
- Test with simulation — use Simulation Testing to validate routing accuracy across different message types
- Monitor routing quality — review conversations in Analytics to catch mis-routed messages and adjust descriptions or routing instructions
Troubleshooting
Router always picks the same agent
Router always picks the same agent
Problem: All messages go to one agent regardless of intent.Solutions:
- Check that each agent has a distinct, detailed description
- Review the router’s prompt template for rules that may bias toward one agent
- Ensure multiple agents are selected in the router’s configuration
Router picks the wrong agent
Router picks the wrong agent
Problem: Messages are routed to the wrong specialist.Solutions:
- Improve agent descriptions — make them more specific about what each agent handles and doesn’t handle
- Add explicit routing rules in the prompt template for ambiguous cases
- Add knowledge sources to the router if routing depends on domain-specific context
User sees no response
User sees no response
Problem: The router fails silently.Solutions:
- Verify the router has at least one agent configured
- Check that the user has permission to access at least one of the router’s agents
Related
- Agents — Full agent configuration reference
- Agent Best Practices — Design patterns and tips
- Simulation Testing — Validate routing accuracy
- Agent Permissions — Control agent access