Widget Configuration
Dictate a Message
Message dictation is off by default. Enable Speech to text enabled in the tenant configuration to make it available in the agent chat, widget, and SDK. When disabled, the microphone is hidden and audio transcription uploads are rejected. In the agent chat and embedded widget, select the microphone in the message composer and allow microphone access. The composer shows a live waveform as you speak. Select the checkmark (Confirm dictation) to finish. After a brief transcription step, your words appear in your existing draft, ready to edit before sending. Select × (Cancel dictation) or press Escape to discard a recording or cancel a pending transcription. Your previous draft and attachments are restored. Recordings stop automatically after two minutes. Switching conversations discards an unfinished dictation. Dictation is unavailable during a live voice call or while a message is being sent. In the administration interface, sent messages that used dictation carry a microphone badge in conversation history. Hover over it to see Used speech to text. The badge is hidden in the user chat, embedded widget, and shared conversations. The marker remains if the draft was edited before sending; clearing the entire draft removes it from the next message. Multiple recordings can contribute to the same message. In Django administration, Audio transcriptions lists successful dictations with their creation time, model, OpenAI request ID, and linked message and conversation. Open a record to read Raw text, the original text returned by the transcription service before any draft edits. Search by the request, message, or conversation ID to investigate a specific dictation. The record is saved as soon as transcription succeeds, even if the draft is never sent. Use the Message → Empty filter to find records without a message or conversation link. Sending the draft links its record to the message without changing the raw text. Audio is not retained. Deleting a conversation deletes its linked transcription records. This tracking applies to new dictations; older messages are not retroactively marked, and records created before raw-text storage was introduced have no raw text. Dictation requires HTTPS (or localhost) and a browser that supports microphone recording. If access is denied, enable the microphone in your browser’s site permissions. The standard widget script delegates microphone access automatically; a custom iframe must includeallow="microphone", and the host page must permit microphone access in its Permissions Policy.
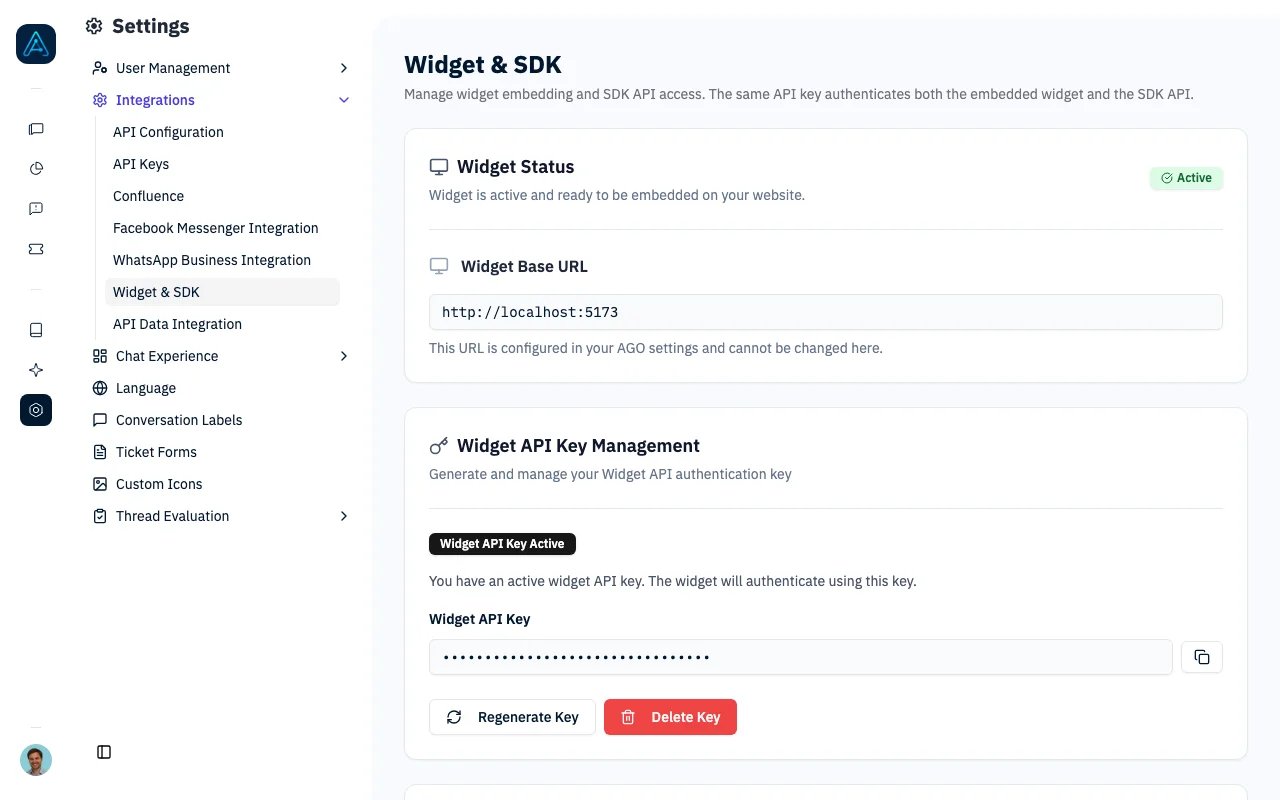
Accessing Widget & SDK Configuration
Navigate to Channels → Widget & SDK in the admin panel.Features
Widget Security Settings
JWT JWKS URL (Optional)
Configure JWT authentication for added security:- Set the JWKS URL for JWT token verification
- Leave empty if not using JWT authentication
- Example:
https://your-domain.com/.well-known/jwks.json
JWT Fields Mapping (Optional)
Extract additional information from JWT tokens and include it in ticket private comments:- Configure which JWT claims to extract and their display labels
- Supports nested fields using dot notation (e.g.,
user.department) - Extracted fields are automatically added to private comments when tickets are created
- Works with both Zendesk and HelpScout ticketing systems
- Leave empty if no JWT field extraction is needed
jwt_field(required): The name of the JWT claim to extract. Supports dot notation for nested fields.label(required): The display name that will appear in the ticket private comment.ago_field(optional): Binds the extracted value to a canonical AGO field that can trigger business rules (for example,zendesk_create_or_update_organization_external_id).
- When a user authenticates with a JWT token, the system extracts the configured fields from the token
- Extracted values are stored with the user session
- When a ticket is created, the extracted fields are automatically appended to the ticket’s private comment
- The private comment will contain each field formatted as:
Label: value
- Track department or team information for internal support
- Include employee/customer IDs for enterprise applications
- Add custom metadata from your authentication system
- Maintain audit trail with user context information
- String values (e.g., “IT Department”)
- Numeric values (e.g., 12345)
- Boolean values (e.g., true/false)
- Nested objects using dot notation (e.g.,
user.profile.department)
Metadata Fields Mapping (Optional)
Extract additional information from widget metadata (sent viasendMetadataToAGO()) and include it in ticket private comments:
- Configure which metadata fields to extract and their display labels
- Supports nested fields using dot notation
- Extracted fields are added to private comments when tickets are created
- JWT values take precedence over metadata values when both map to the same AGO field
metadata_field(required): The name of the metadata property to extract. Supports dot notation for nested fields.label(required): The display name that will appear in the ticket private comment.ago_field(optional): Binds the extracted value to a canonical AGO field that can trigger business rules.
Prefill Zendesk Ticket Fields from Metadata
Use thezendesk_prefill_ticket_field_<ZENDESK_FIELD_ID> AGO field to populate a Zendesk custom field on ticket creation with a value coming from JWT claims or widget metadata. Replace <ZENDESK_FIELD_ID> with the numeric ID of the target Zendesk ticket field.
Values resolved from JWT take precedence over widget metadata. If the end user also sets the same field through the ticket form, the form value wins.
Example Configuration:
12345 set to the widget metadata accountNumber, and custom field 67890 set to the JWT department claim.
Send Metadata to the Agent
Off by default, the metadata never reaches the AI agent — it only feeds tickets. Turn this toggle on to also include it in the agent’s prompt, so it can answer using the context your page provides (subscription plan, current order, seats used…).- The full metadata object is sent with every message, so the agent always sees the latest values
- The payload must stay under 10 KB; a larger one is dropped instead of being sent to the agent
- Your page controls the metadata, so a visitor can edit it in their browser: never use it to decide what a user is allowed to see. Use permissions or JWT authentication for that, and API Data Sources for data that must come from your servers
Allowed Domains
Control which domains can embed the widget:- Add multiple domains to the allow list
- Leave empty to allow all domains
- Provides CORS protection for your widget
- You don’t need to add your AGO address (
<your-workspace>.useago.com): the embedded chat is always allowed to call your workspace
Widget Display Settings
Knowledge Home Page
- Toggle: Enable/disable the knowledge home page in the widget
- When enabled, users can browse knowledge articles directly in the widget
- Default: Enabled
Widget User Permissions
Manage these defaults in AI Studio → Permissions. The Widget & SDK page links to that page.Default Permissions (Anonymous Users)
- Selection: Choose one or more permissions to automatically assign to anonymous widget users
- Applied to users accessing the widget without JWT or auth-token authentication
- Leave unselected if no automatic permission assignment is needed
Logged-in Default Permissions (Authenticated Users)
- Selection: Choose one or more permissions to automatically assign to authenticated widget users
- Applied to users accessing the widget with valid JWT or auth-token authentication
- An auth token counts as authentication only once your API data source resolves it to an email address. Users whose token is not resolved keep the anonymous defaults; their token is still forwarded to tools
- Takes precedence over the anonymous defaults when authentication is present
- Leave unselected if no automatic permission assignment is needed for authenticated users
Widget Integration
Once configured, the widget can be embedded using the provided HTML examples:Basic Integration
Header Colors
colors.header accepts a solid color or a CSS gradient:
transparent show the widget’s own light surface, not your brand color.
The header title and icons pick white or black automatically, whichever stays
readable. For a gradient, the least readable band decides: the example above is
light throughout, so the text comes out dark.
Colors are read as hex (#463FE6, #fff), rgb() / rgba(), or hsl() /
hsla(). Named colors such as red are not recognized: they are skipped when
picking the text color, and if nothing in the value can be read, the text stays
white.
With a Default Agent
UsedefaultAgent to route new conversations to a specific agent. Pass the agent’s name (as shown in the admin interface):
With Unread Message Notifications
Enablenotifications to show a notification bubble above the chat button when a staff member has replied and the user hasn’t seen the message yet. The widget polls for unread messages every 30 seconds. The notification only appears for returning users who have a previous chat session.
You can customize the notification message using notificationMessage with a \{\{count\}\} placeholder for the number of conversations with unread staff replies. The default message is “You have {{count}} new message(s)”.
With User Metadata
Set initial metadata before loading the script so it is available when the widget opens:sendMetadataToAGO, as shown below.
Vue.js Integration
In a Vue.js application, load the widget script in yourApp.vue (or a layout component) using the onMounted lifecycle hook:
sendMetadataToAGO once the widget is loaded:
sendMetadataToAGO(...) again later (for example when the user context changes in a SPA). The widget stores the latest value and re-sends it to the chat iframe every time it opens, so the next message always carries the current metadata. If you prefer, you can also mutate window.AGO.metadata directly — it will be picked up the next time the widget opens.
Custom CSS Styling
You can customize the widget appearance by adding CSS rules to your website. The widget uses fixed positioning with the following element IDs:#ago-chat-button— the chat button (default:bottom: 20px; right: 20px)#ago-prompt— the welcome/notification bubble (default:bottom: 80px; right: 20px)#ago-chatbot— the chat panel (default width:550px)
Adjusting Widget Width
Set the--ago-panel-width custom property rather than width directly. It is the
supported contract, and unlike a width override it cannot break the closed state or
the mobile fullscreen layout:
#ago-chatbot wins over window.AGO.panelWidth without needing !important.
The width is floored at 400px, capped by the viewport, and ignored below a 450px viewport
where the panel is fullscreen. See
Panel size for the full contract.
Adjusting Widget Position on Mobile
If your website has a bottom navigation bar or toolbar on mobile, you can move the widget button up to avoid overlap:<style> block in the <head> of your page. Adjust the bottom values to match the height of your navigation bar.
SDK API
The SDK API uses the same authentication as the embedded widget, so you can build custom chat interfaces on top of AGO without using the embedded widget. The SDK API base URL is displayed on the Widget & SDK configuration page. For the full SDK API reference including all endpoints and examples, see SDK API.Security Considerations
- Use allowed domains to restrict where your widget can be embedded
- Implement JWT authentication for additional security in sensitive environments
Troubleshooting
- Widget not loading: Check the browser console and verify the base path is correct
- SDK API returning 401: Verify a valid
X-User-Anon-Idheader is provided - Cross-origin errors: Check that your domain is in the allowed domains list
- Authentication issues: Verify JWT JWKS URL is accessible and properly configured
Related
- SDK Integration — JavaScript SDK
- Pre-chat Form — Pre-chat configuration
- Conversation Starters — Starter messages
- Deploy the Chat Widget — Deployment guide